Make an Affordable Interactive Videomapped Installation
By Meghan Athavale
CEO, Lumo Interactive
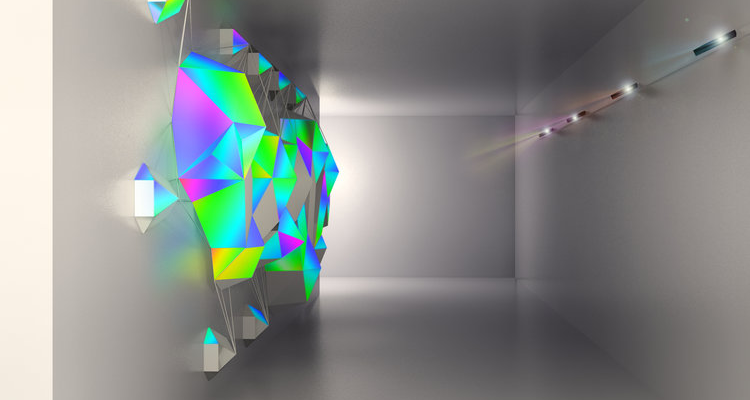
Have you seen walls and floors that look like they’re coming to life, pulsating and casting shadows in ways that seem to defy the laws of physics? You’re probably seeing video mapping (AKA projection mapping) in action — a technique that uses carefully aimed light to make illusions. While they first began as high-end light shows for DJs and performers, they’re starting to show up all over the place.
In this post, I’m going to explain what they are, how they work and how you can make your own (and make it interactive).
HOW CUSTOM-SHAPED INTERACTIVE PROJECTIONS ARE MADE
Interactive floors and walls are becoming a more common lighting feature of architectural installations. Digital displays make great design elements: They bring architecture to life, can be easily updated seasonal and event-based themes and can be used for dramatic, high-contrast lighting in otherwise poorly lit or bland areas.
But what you may not know is that digital displays can also be created to suit a wide variety of shapes and designs.
You can use a projector or custom LED panel to light 3D elements, irregularly shaped surfaces, and architectural features like sculptures and brickwork really creatively. Later in this post, I’ll explain how to use a simple design tool like Photoshop to create a custom interactive projection (a pond) within a 3D architectural feature.
VIDEO MAPPING AND PROJECTION MAPPING
Lighting a 3D object or an irregular shape with a digital display is called video mapping or projection mapping. There are a large number of solutions on the market designed to make the process of video mapping easier. These include VJ software like Resolume or Modul8, advanced media server software/hardware combinations like Christie’s Pandora’s Box or Green Hippo, and even consumer-level hardware solutions like Lightform.
Lightform’s simple sensor allows you to video map 3D objects easily using a number of pre-built effects.
HOW DOES VIDEO MAPPING WORK?
There are many different ways to wrap a display around a 3D object, but the basic principle is the same: You have to change the image you’re projecting so it fits the 3D world on which you’re projecting it.
In traditional projections, the image coming from your computer is designed for a flat surface. For example, if you’ve lined up your projector with a wall, what you’ll see on your computer’s screen will be what you see on the wall, as long as that wall is relatively flat, and the output image is the same aspect ratio as the target display.
But what if that wall isn’t flat? That’s where projection mapping comes in. When you video map or projection map an irregular shape or a 3D object, your computer modifies the video or image so that when it’s projected, it looks normal. This means that what you see on your computer screen is a distorted version of what you’re projecting.
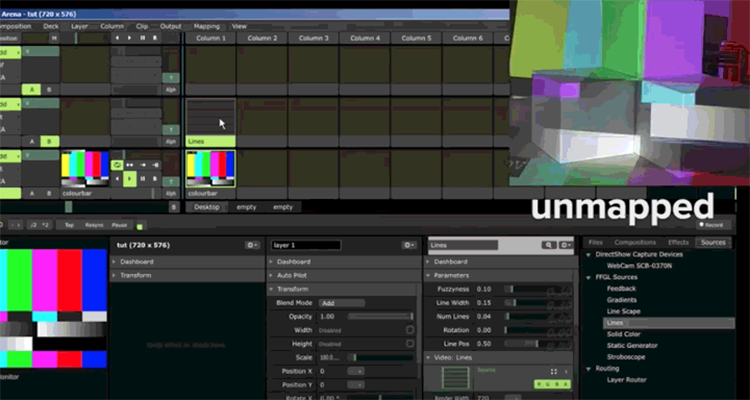
Without this distortion, you won’t get the kind of illusion you’re after. Below, you can see what a straight, flat, unmapped image looks like when projected on 3D boxes (as opposed to a properly mapped, distorted image). It’s basically just a flat image, and the boxes distort it.

Credit: VJFit. See his full tutorial here.
To make the image on your screen “fit” the object you’re projecting on, you need to distort it and crop it so that the finished projection will wrap properly around the edges and won’t project outside the borders of the object. And that takes work.
The web is full of tutorials that show you how to create 3D video-mapped display graphics using all kinds of software solutions (or combination of solutions). Usually these techniques combine a media player (to play the video) and a 3D design tool (to figure out how to bend and crop the video so it lines up properly with the thing on which you’re projecting.) Unfortunately, the learning curve for these applications can be super high.
VIDEO MAPPING IS HARD WORK—USUALLY
If you have the time to learn 3D modelling, and money for a media player, the creation of a complex 3D mapped experience can be super rewarding. One of the coolest things about this skill set is how well it scales. From small boxes in your living room to entire buildings and stages, the techniques and creative process are pretty much the same.
Once you’ve learned to map small boxes, bigger boxes are a piece of cake. Credit: Fabrik Madrid
But what if you don’t have the time to learn a bunch of sophisticated software applications? This is often the case with members of our Lumo Play community, many of whom are agencies and audio-visual professionals tasked with creating an interactive floor or wall that will fit inside an irregular space, or wrap on top of a 3D surface. Lumo Play can do the hard work for you, so you can focus on the design.
Here are some instructions to help Lumo Play users create amazing, 3D-mapped interactive displays without having to go back to school to learn 3D modelling and invest in expensive media server solutions.
Lumo Play interactive display software used on a projection mapped car.
(An added bonus is that what you make will be interactive, reacting to the movements of other people. While most projection mapping is controlled by a computer, or an artist, Lumo Play-based 3D video-mapping can respond to the audience!)
WHAT YOU NEED TO MAKE AN INTERACTIVE 3D VIDEO-MAPPED DISPLAY
In order to design an interactive video-mapped effect, you will need:
- A projector
- A computer
- A web camera or Kinect for Xbox One sensor
- Lumo Play software
- Adobe Photoshop or a similar graphic design software
STEP ONE: INSTALL YOUR PROJECTOR AND NEVER MOVE IT AGAIN
Because you will be designing your distorted graphic effect using regular old graphic design software (instead of an expensive live mapping media server that can adjust when the physical world moves), it’s important that you start by installing all the things exactly where you want them. The image you create will fit exactly on the installation once it’s created, but it won’t work if anything gets moved.
If you’re creating a temporary display, this can be a problem for complex 3D sculptures or objects like cars. But it’s not as critical for mostly flat displays like ponds, where all you’re customizing is the shape and size of the display.

For more complex shapes, you definitely want to have your display, and the object you’re projecting on, firmly in place before you begin. Even small movements will throw your image out of whack. Source

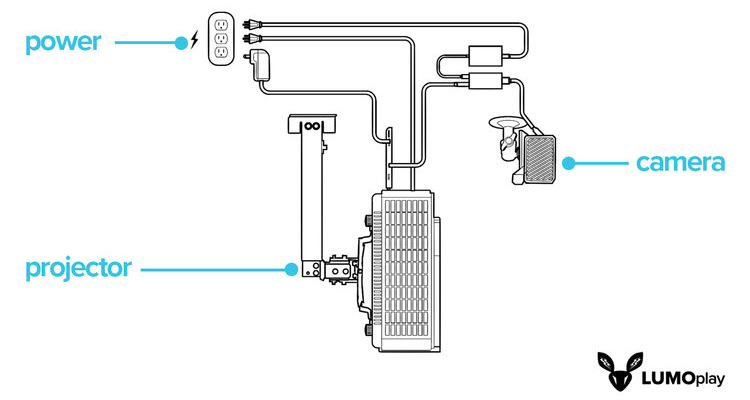
The basic requirements for an interactive projection display system. Make sure all these things are installed in their final location before you begin.
STEP TWO: MAKE YOUR DISTORTED DESIGN
This step actually has a few sub-steps. Here they are:
- Make sure you know exactly what the final resolution of your projector is. In pixels.
- Connect your computer to the projector you’re using.
- Go to your computer display settings and make sure your displays are mirrored (the projector and the computer are showing the same thing) and that they are the resolution of the projector. If you aren’t sure how to do this, google ‘change display settings for [insert your computer’s operating system here]’.
- Open Photoshop (or whatever design software you want to use. You don’t need anything fancy. This guy uses MS paint.)
- Create a new image that is the exact resolution of your projector. Make the background white.
- Choose the painting tool of your choice, and make the ink color black so it’s easy to see.
- Fullscreen your image so that it takes up the whole screen.
- Draw on the object you plan to project on.

STEP THREE: SEND YOUR CUSTOM SHAPE DESIGN TO LUMO PLAY
Save your custom shape. If you’ve created a complex shape (of a 3D sculpture, for example) you should also take and send a photograph of the sculpture from the viewpoint of the projector (as closely as possible). For mostly flat surfaces, the outline file is sufficient.
We’re working on adding custom masking layers to our patented online Motion Maker template tools so our community members can create the final designs themselves, but right now we still create these irregular shapes as custom orders. That means that, at this point, your work is done! Send us the image and, if you have one, the photo.
We’ll use your custom projection mapping design file to create an interactive display that will exactly fit the dimensions of your irregular display area. This file will be added to your Lumo Play account when it’s finished, and you will be able to load it in your Lumo Play software.
Custom shaped video mapped pond created using Lumo Play software.
DO YOU HAVE A CUSTOM VIDEO MAPPING PROJECT?
We’d love to help! You can send you project details here and we’ll let you know how much it will cost to create something magical.
Let us know if you have questions. We’re happy to help!
This column was reprinted with permission from Lumo Interactive and originally appeared here.


