Interactive Floor Systems for Tradeshows and Events
By Meghan Athavale
Lumo Interactive
We’re contacted by a lot of agencies and businesses that want to set up an interactive floor at a tradeshow or event, but don’t quite understand how it all works, or what kind of equipment they’ll need. To help you decide if an interactive floor makes sense for your project, here are some basic ground rules about equipment, setup options, and content.
Usually, an interactive floor involves a display of some sort, a sensor (which may or may not be built into the display), and a computer. Here, in order of highest to lowest cost, are the three main types of interactive floors available, with pros and cons.
REAR PROJECTION OR HIGH DEFINITION LED PANELS
- Rental cost: $$$
- Ease of installation: very difficult and time consuming
- Pros: No shadows, most realistic display, works great in well lit environments, highly customizable, often includes remote content creation/management so updating content is relatively easy
- Cons: much longer setup time, expensive, most likely to break if incorrectly installed, shortage of installation experts means labour costs are high
Description of technology
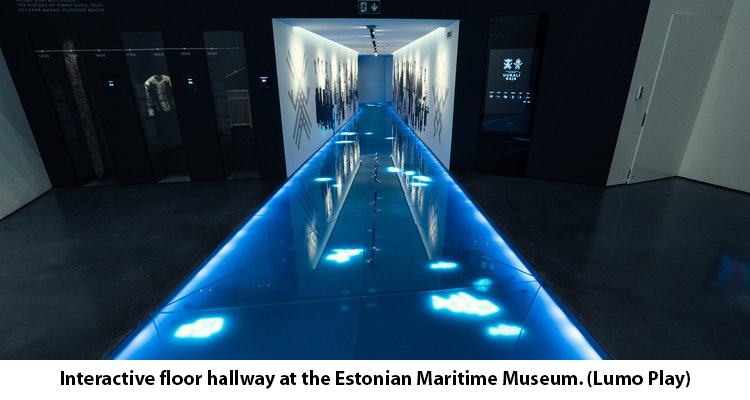
In this type of setup, a display is installed directly on the floor, either by rear projecting on a raised surface of rear-projection acrylic, or by using monitors or LED panels, usually with a surface of impact resistant plastic or glass above them (since you obviously can’t walk directly on a flat screen TV or an LED panel).
These displays either use sensors mounted above the floor area (as is the case in the above picture) or they use an IR array at floor level to track the motion and interaction of people. In some cases, capacitive film can be used, which essentially creates a giant touchscreen on the floor, but this is not recommended unless you have a significant budget for maintenance and repairs, as capacitive film is easily damaged by day-to-day use, and is typically designed for touchscreens on walls, not as something people walk on.
Where to get this
These types of installations are highly customized, and are normally provided by experienced, specialized AV teams. Here are a few companies you can reach out to if you want to look into an installation like this (they’re also worth checking out for other cool ideas):
SIMPLE LED PANEL FLOORS
- Rental cost: $$
- Ease of installation: Fairly easy. Pre-made panels can usually be assembled within 24 hours
- Pros: No shadows, can work in well lit environments if LED panels are bright enough, super fun and easy for the audience to use
- Cons: setup time is still fairly long, limited number of rentals available, can break if incorrectly installed, difficult to repair broken tiles during a show, low resolution limits what kind of graphics you can use
This video by AvWuff is one of the best breakdowns ever made of what’s involved in making an interactive LED panel floor from scratch, and also does a great job of illustrating why these systems are still few on the ground and expensive to rent.
Description of technology
Unlike most interactive floor systems, each panel reacts to pressure. The software included with these installations is typically custom designed for the specific floor, and can be limited in what it can do content-wise. There will usually be significant software development costs for customization.
Where to get this
There is a growing number of rental agencies that carry solutions specifically for tradeshows and events. While the cost is significantly more than a projection based system, this solution is a really good choice for venues that need something super durable, like parties or promotional events.
PROJECTION INTERACTIVE FLOOR SYSTEMS
- Rental cost: $ – $$
- Ease of installation: Easy; most audio-visual installers can install a system within 2-4 hours
- Pros: Can work in well lit environments if projectors are bright enough, highly customizable, easy to find DIY or turnkey options in any country, most flexible option in terms of budget, can be scaled to almost any size using multiple projectors/sensors, flexible equipment mounting options
- Cons: works best in moderately lit environments — the cost of the installation is largely based on the brightness of the projector, shadows can be a problem if the content is not well designed

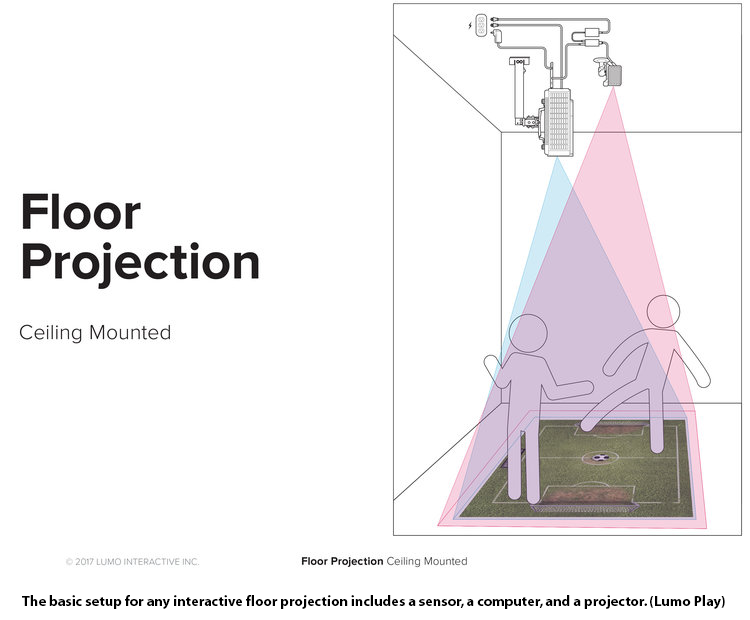
Interactive projection floors are among the most common and easiest to implement solutions on the market. This is because the interactivity is usually based on motion capture using a camera or IR sensor, which means the display itself can be made using any kind of projector, and can be set up in a much wider variety of ways than the other options, where display hardware must be installed on the floor and must be durable enough to withstand people walking all over it. Walking on a projection is, by comparison, a lot less worrisome.

The way these systems work is pretty much the same, no matter which solution you choose. All systems involve a computer running software that takes information from a sensor and outputs an interactive video display.
Because this is a relatively simple solution compared to the first two options, there are a lot more choices on the market, each with different advantages and disadvantages. For this reason, it’s a good idea to shop around before making a decision.
Where to get this
Here are some of the big players in the interactive floor display industry. Unlike the previous two options, where the solutions are pretty much always offered and delivered in the same way, these solutions can differ quite a lot in terms of price and flexibility, so a description of what differentiates them has been provided.
 GestureTek — The grandfathers of this technology, GestureTek has been offering interactive floor and wall solutions for over 25 years and has patented hardware solutions that are licensed to companies like Sony.
Unfortunately, their website can be difficult to navigate. They focus primarily on turnkey solutions, which include hardware and software and are designed to be plug and play. To rent a GestureTek solution for an event or show, you may need to connect with an AV company that has one.
Customization of the games and effects is achieved through an SDK, which means you’ll still need to hire a developer to do anything more complex than adding a logo to your effect or game.
GestureTek offers a solution called The Cube, which is probably the best turnkey system available for portable installation, since it sits on the floor and uses an ultra-short-throw projector. This means it can easily be packed and unpacked, and nothing needs to be suspended from above.
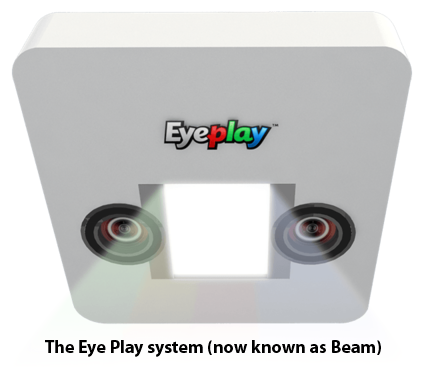 EyeClick — Based out of Israel, EyeClick has offices across North America and the rest of the world. You’ll find their interactive floors in retail locations like McDonalds, in airports and museums, and increasingly, in schools. While they offer many options, their main focus is a turnkey device called Beam. They typically sell their solution on a subscription basis, making it difficult to rent for a limited engagement unless you can find someone who already has a system.
A huge advantage to the Beam system is that it can work really well on tables as well as floors, and it comes with a pile of high quality 3D games. Customization is possible, if not intuitive. Most of the content is developed with kids and families in mind, and EyeClick arguably offers the largest number of high quality educational games of all the companies in this arena.
Lumo Play – A software-only solution, Lumo Play is a good choice if you have a dedicated AV rental and installation team for your event. Because it works on any computer, with any projector or digital display, and supports a wide variety of sensors, Lumo Play’s software can be used to create and control interactive floors, walls and touchscreens. It can also be used in installation designs from overhead truss to small, portable ultra-short throw setups, and even pico projector installations.
The software is free to try, and includes patented tools to make and customize twelve types of games and effects on the website or through a downloadable app. Mostly this involves uploading your own images and tweaking some sliders to adjust how the effect behaves, but the live preview feature makes it a lot easier to see what you’re making in real time.
A distinct disadvantage to Lumo Play is that it’s definitely not turnkey, and it may offer too many options. Unless you’re familiar with all the projectors, flatscreens, and sensors the world has to offer, designing your hardware solution can be a bit of a challenge. On the bright side, the trial is free, and the software itself is a one-time purchase (unlike the subscription models offered by most of the competitors), so the actual cost of the software is relatively low, and you have more choice regarding what you want to spend on the hardware, and how you can set it up.
This column was reposted with permission from Lumo Interactive and originally appeared here.
More Stories Like This
Consumer Shows Are Back!

I recently supported one of my dealers at a consumer trade show. And honestly, I couldn’t wait. If anything feels like a return to normalcy it’s that my calendar this year is filling up with customer-facing events that my dealers are organizing. My pedantic nature distinguishes between trade shows and consumer shows. It seems simple: […]
DSE 2022 Overall Experience Was Great for Me
I attended DSE 2022, and my agenda for the show was to meet with people whom I had either only met over video, had not seen in a long time, or people I had not met before to find more opportunities direct or indirect. This was my first event show in the past few years […]
How to Make a Case for Getting Training and Professional Development
It’s good to be back to having conferences, trade shows and events in person again. They started out with lower attendance numbers, but seem to be bouncing back. Over the past few weeks, and every time trade show season rolls around, there’s a lot of discussion about paying for training, particularly in-person training. In fact, […]